Configuration Overview & Pilot Deployment
After you complete the UpgradeMate setup wizard, several objects are created in your Configuration Manager environment. This guide walks you through the items that were created, explains the deployment workflow your devices follow, and highlights the steps you should take for a successful pilot deployment.
Video Tutorial
Requirements
- The UpgradeMate Initial Configuration wizard must have been completed successfully.
Step-by-Step Guide
Objects Created in Configuration Manager
The wizard provisions five categories of objects across the Software Library, Assets and Compliance, and Administration workspaces. Reviewing them before adding any devices helps you understand what each part does.
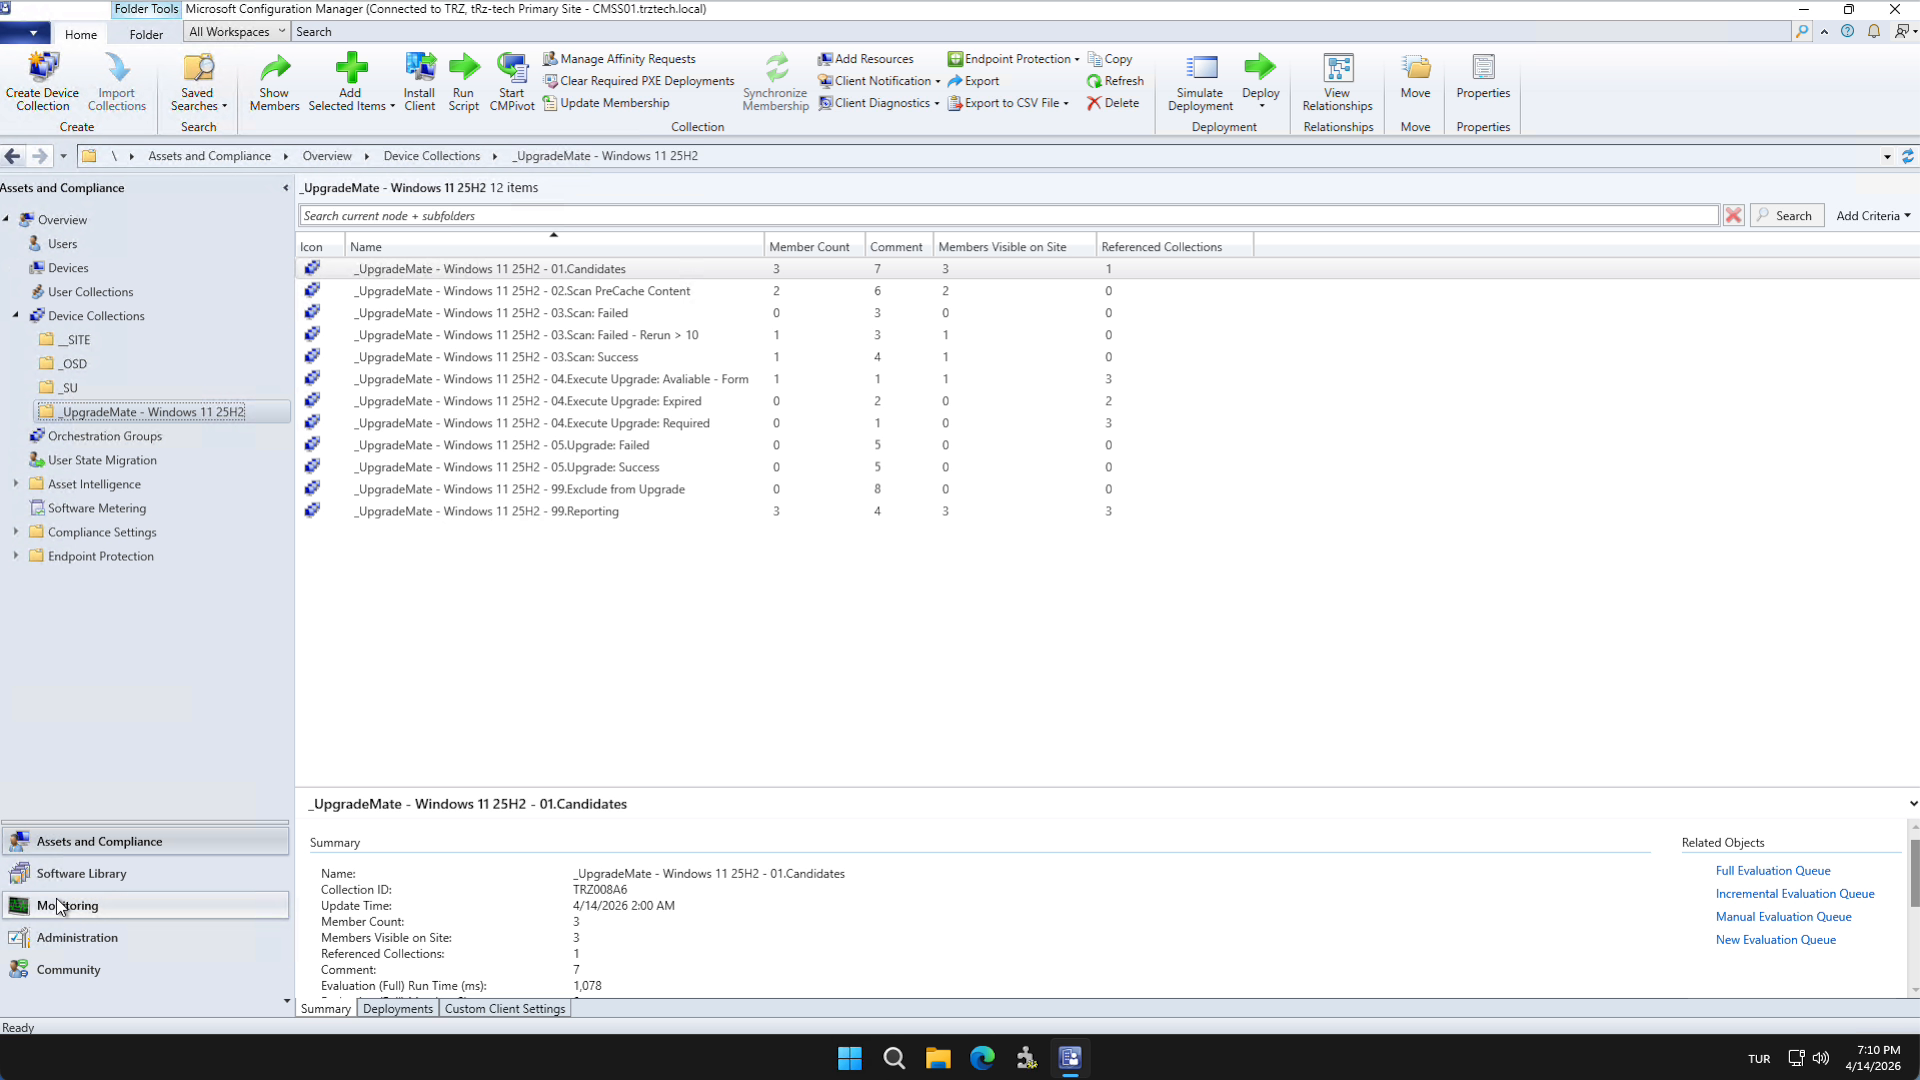
Collections — UpgradeMate creates a folder of 12 device collections under Assets and Compliance → Device Collections. Every step of the upgrade workflow is driven by membership in these collections.
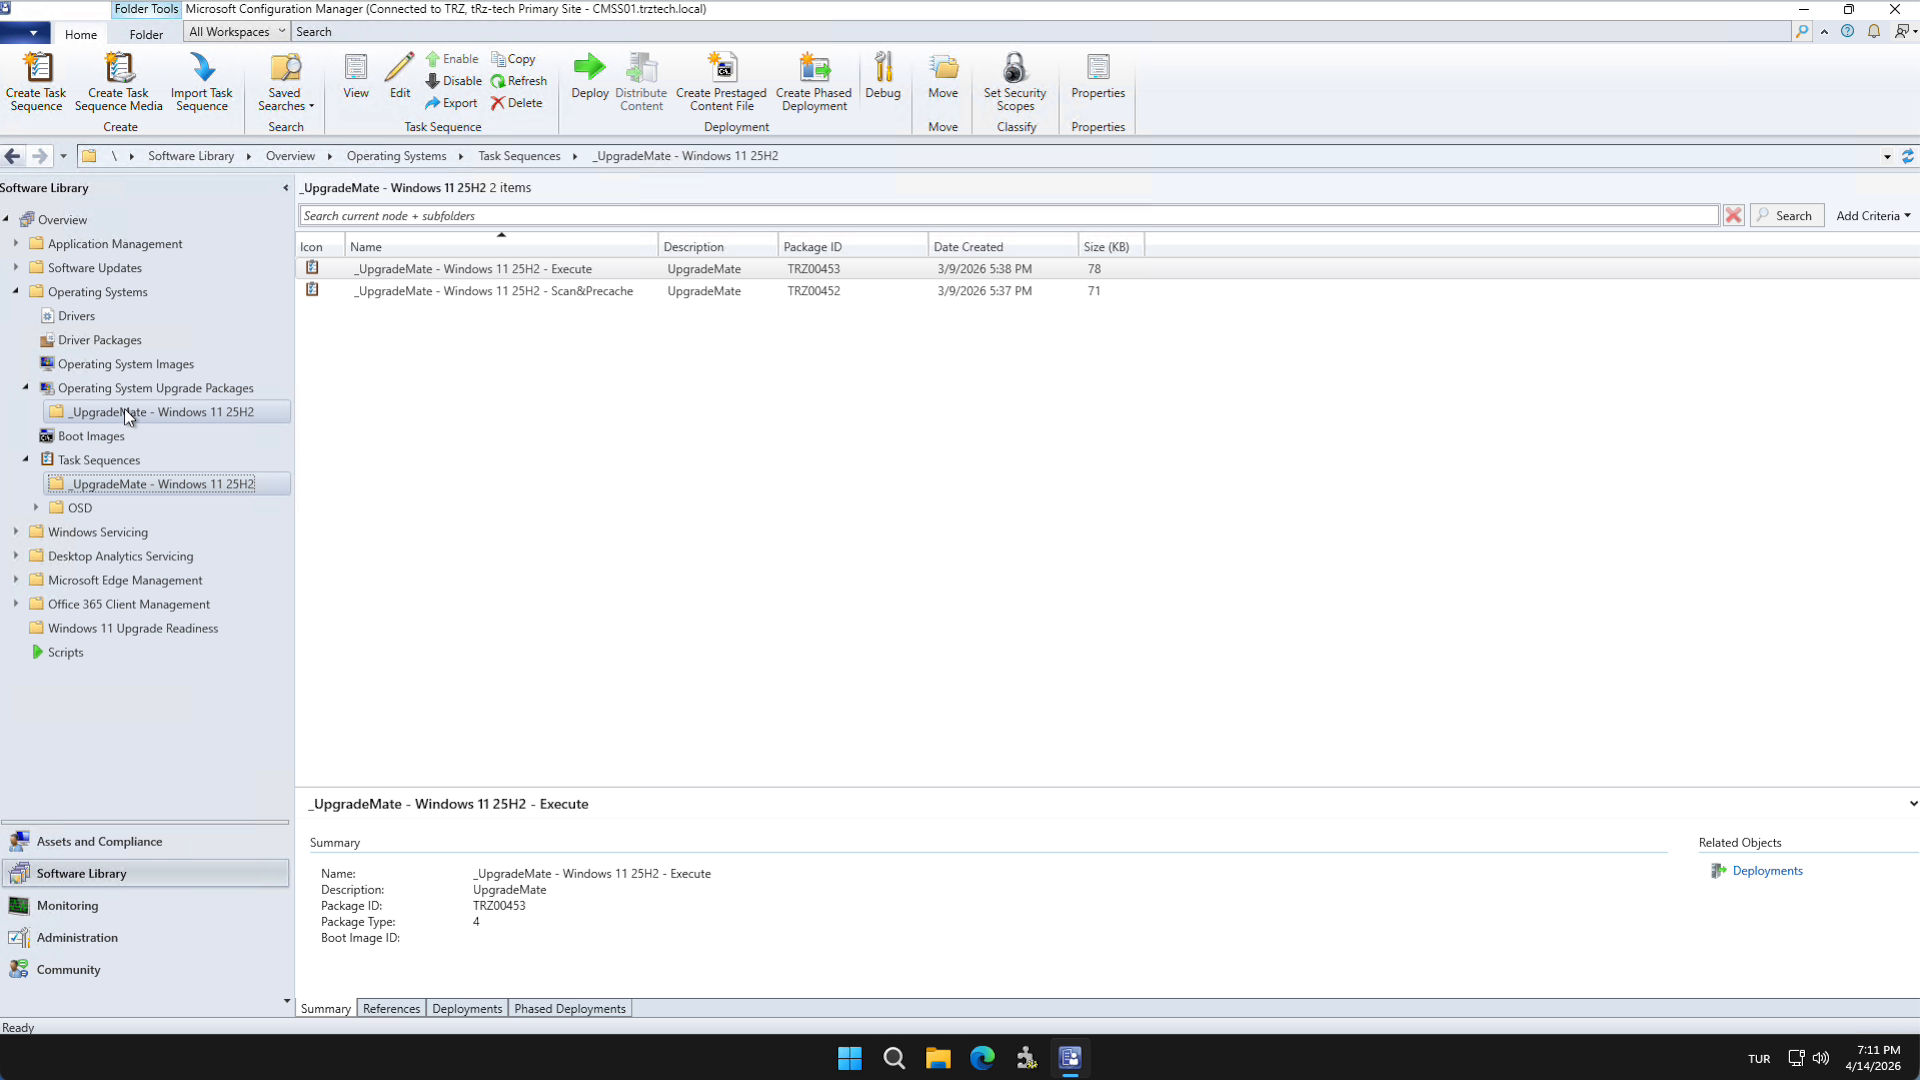
Task Sequences — Two task sequences are created under Software Library → Operating Systems → Task Sequences: one for the scan stage and one for executing the upgrade. Each task sequence already has its own deployment configured to the appropriate collection.
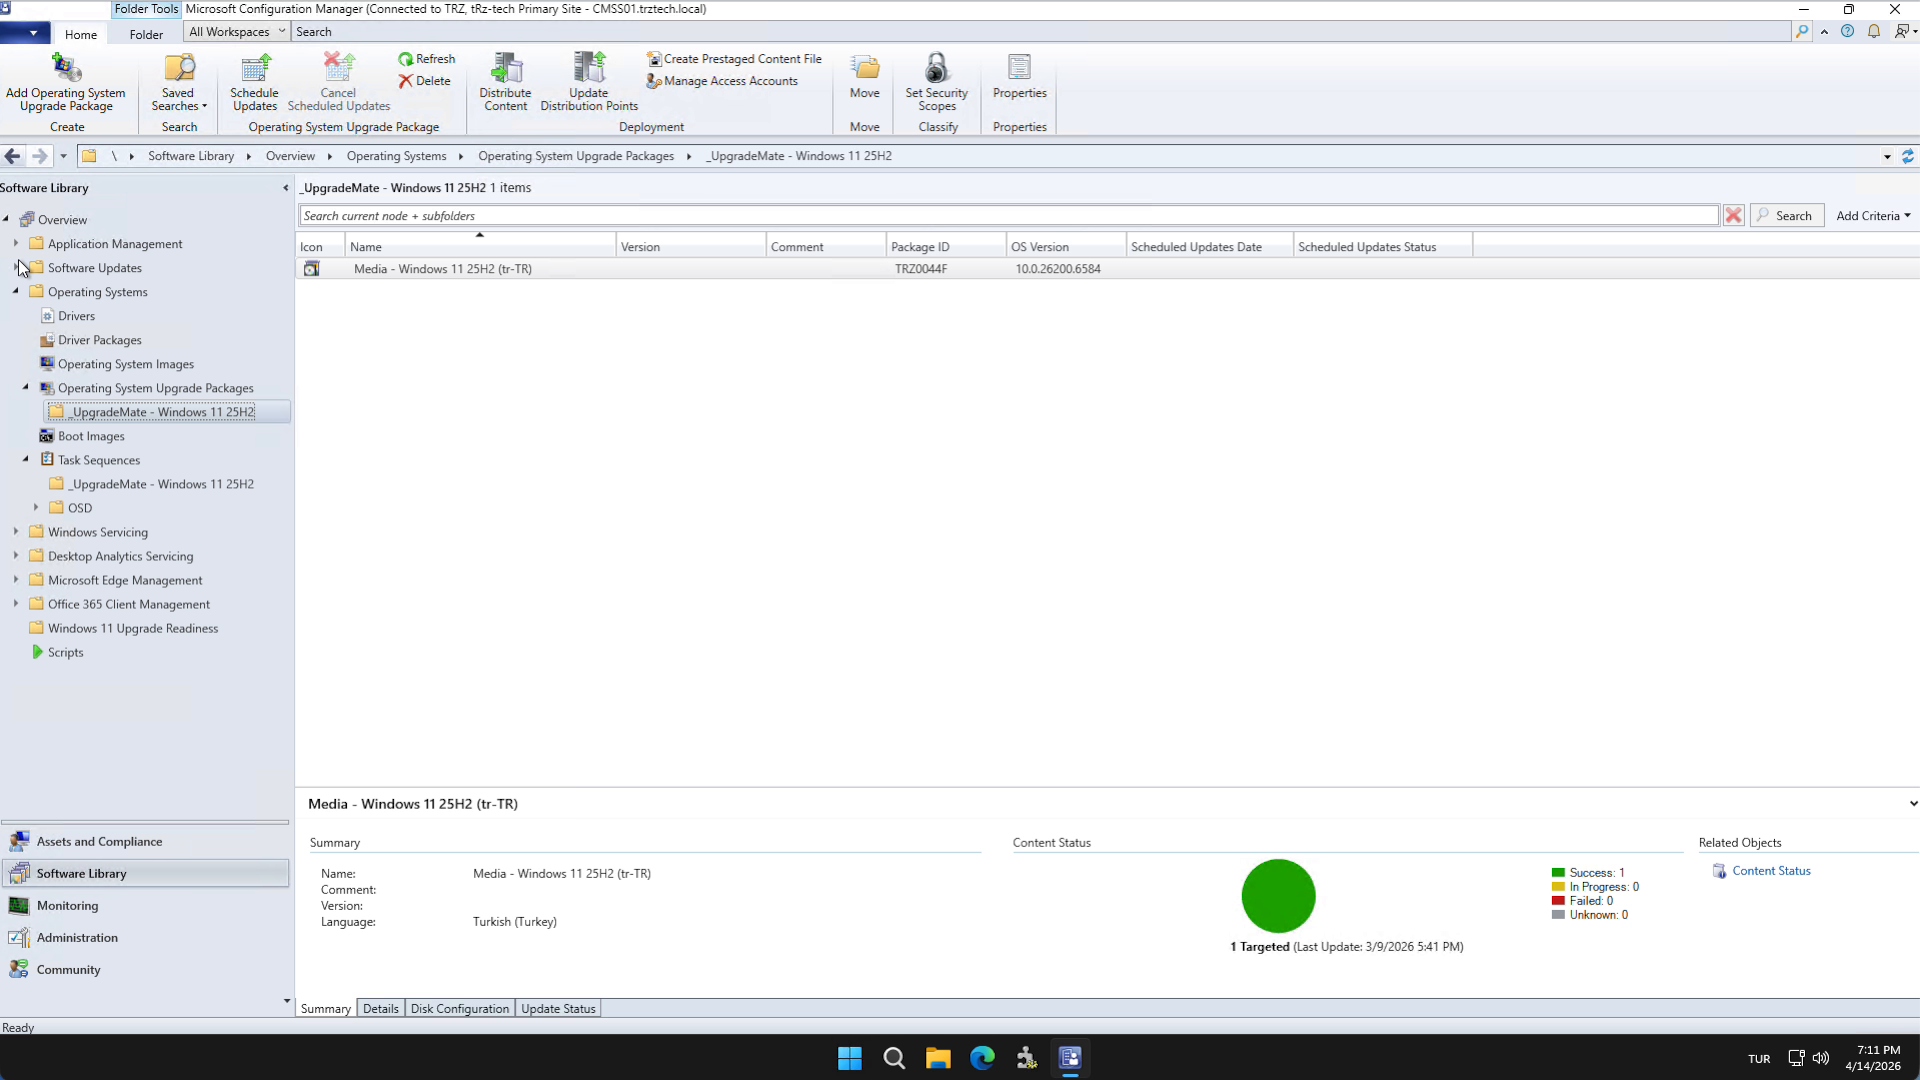
OS Upgrade Package(s) — For every Windows ISO you imported during setup, an OS Upgrade Package is created under Software Library → Operating Systems → Operating System Upgrade Packages.
Form Package — The
UpgradeMateFormpackage is created under Software Library → Application Management → Packages. The form has its own deployment that controls when it is shown to end-users.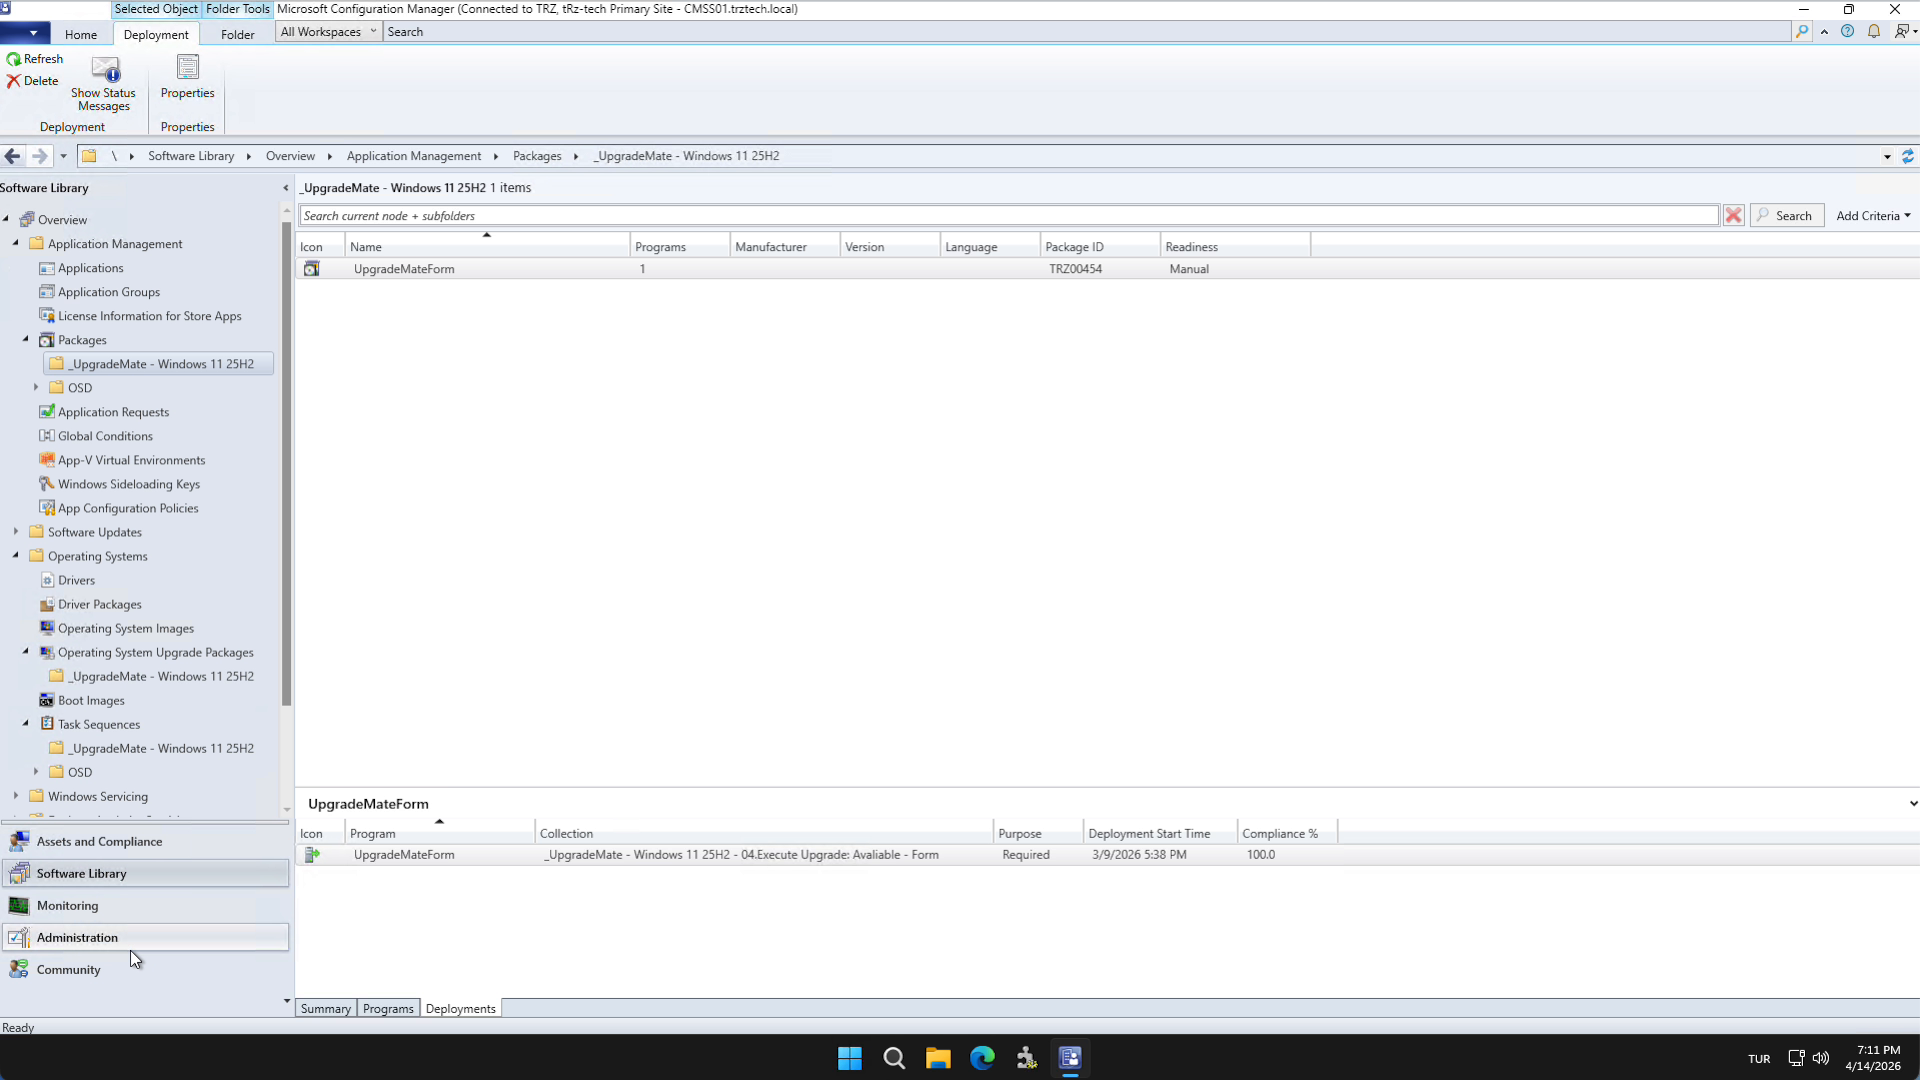
Client Settings — A custom client setting (
CCM Cache Setting for (_UpgradeMate - Windows 11 XXHX)) is created under Administration → Client Settings. It increases the Configuration Manager client cache so the upgrade content can be downloaded without filling the default cache.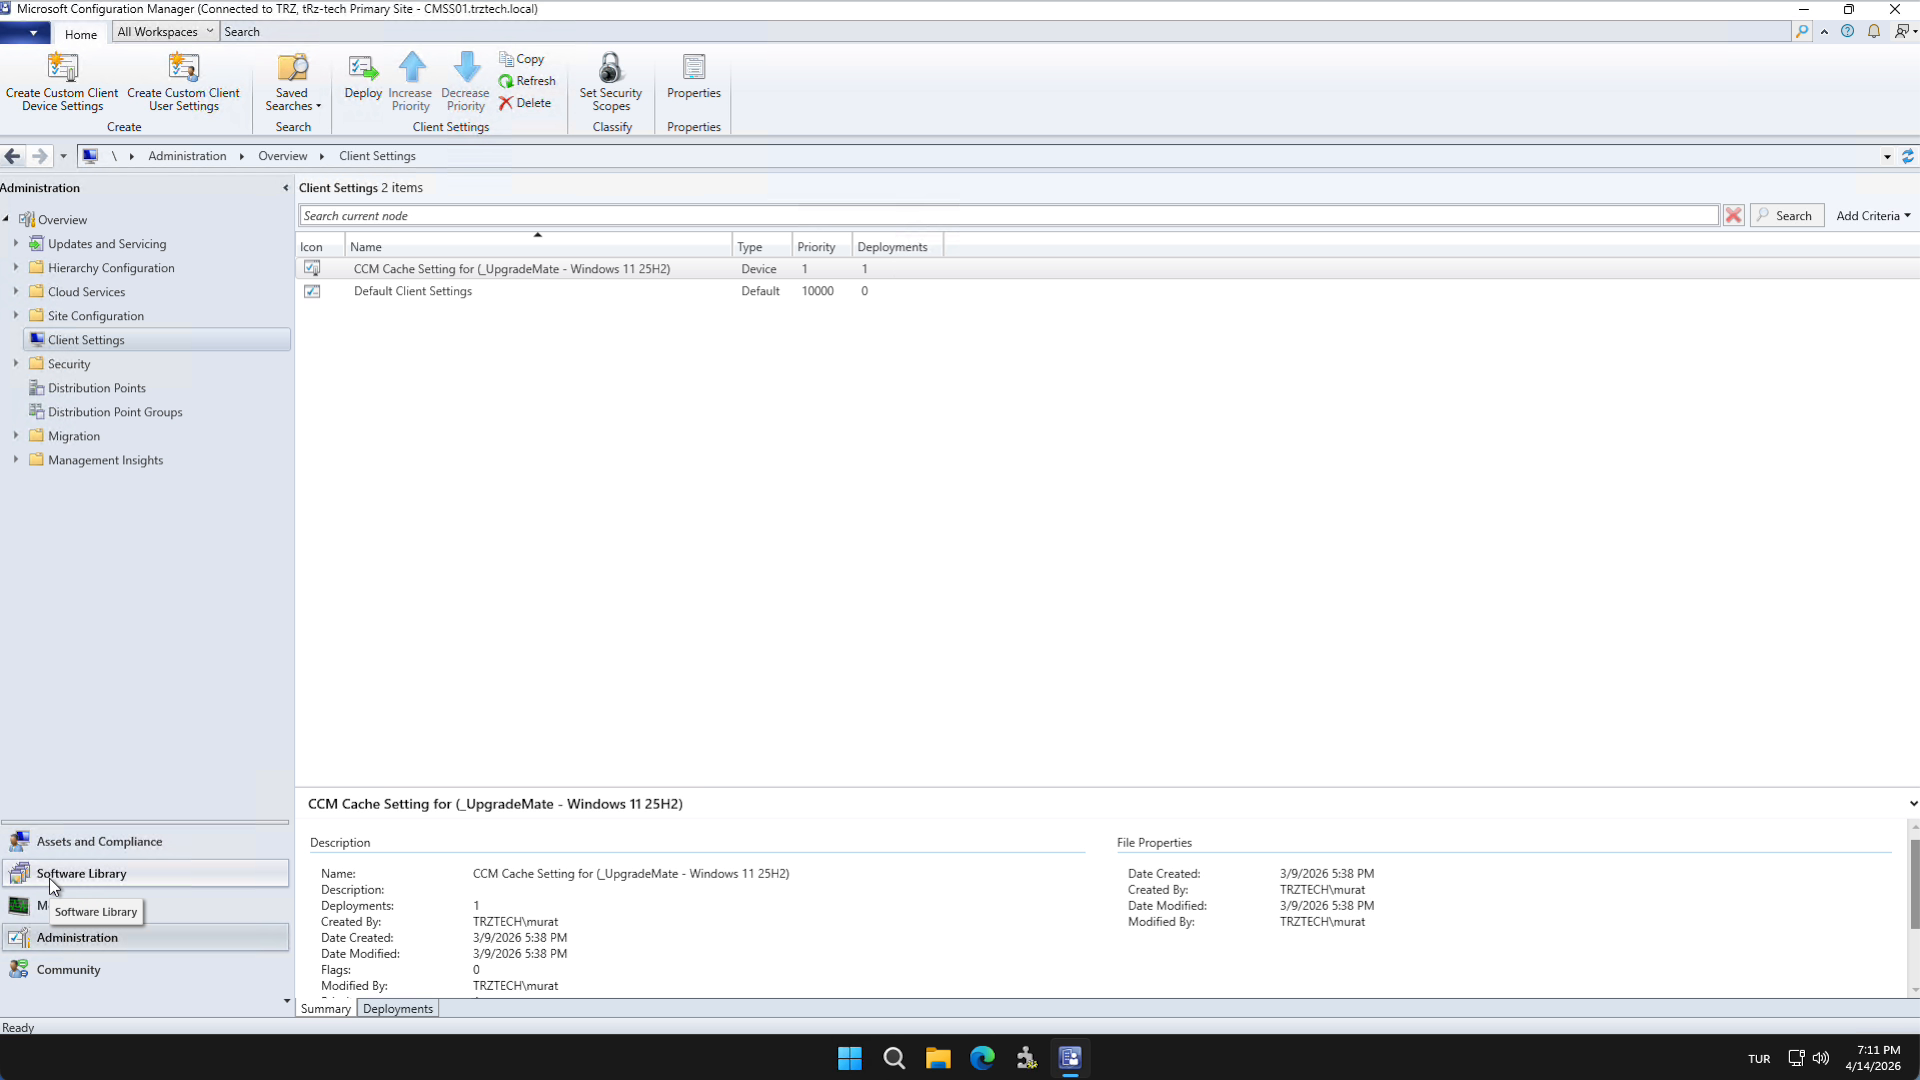
Deployment Workflow & Schedules
Devices move through the UpgradeMate collections in a defined order. Two scheduled deployments — the scan and the form — drive the workflow forward.
Eligible devices are listed automatically in 01.Candidates with version control. If there are devices in this list that you do not want to upgrade, add them to the Exclude from Upgrade collection so they are excluded from both deployment and reporting.
To start the upgrade workflow for a device, add it to 02.Scan PreCache Content.
Key point: From this point on UpgradeMate handles the rest of the flow automatically. The only collection you ever need to populate to trigger an upgrade is
02.Scan PreCache Content.The scan stage runs first. A deployment of the Scan task sequence is targeted at 02.Scan PreCache Content on a daily schedule (default: 10:00 AM). If a scan succeeds, it is not retried. Leave the Run behavior setting at its default.
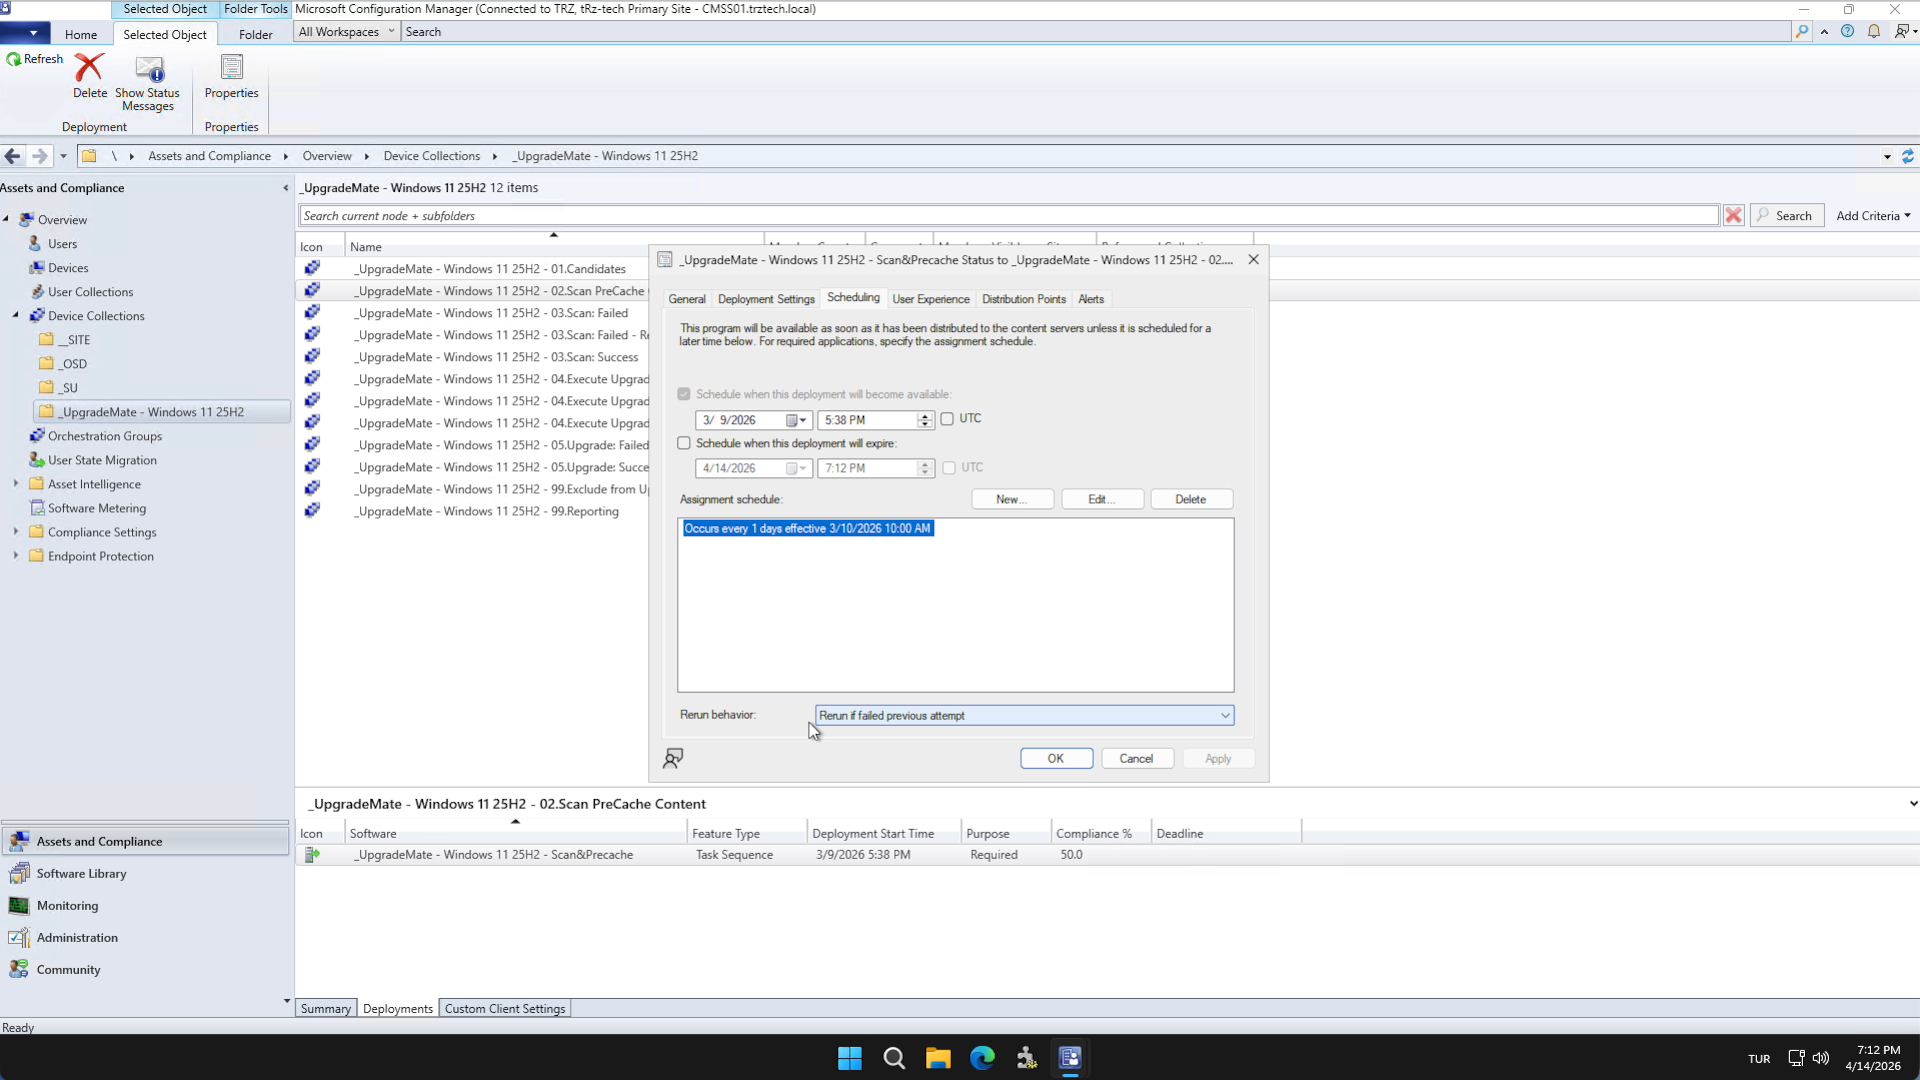
Tip: You can change the time, add additional schedules, or both. Open the deployment and edit the schedule to fit when your devices are typically online and reachable.
Devices that pass the scan move to 04.Execute Upgrade: Available. The UpgradeMateForm deployment targets this collection and controls how often the form is presented to end-users. By default the form is offered every day at 12:00 PM (noon). Leave the Run behavior setting at its default.
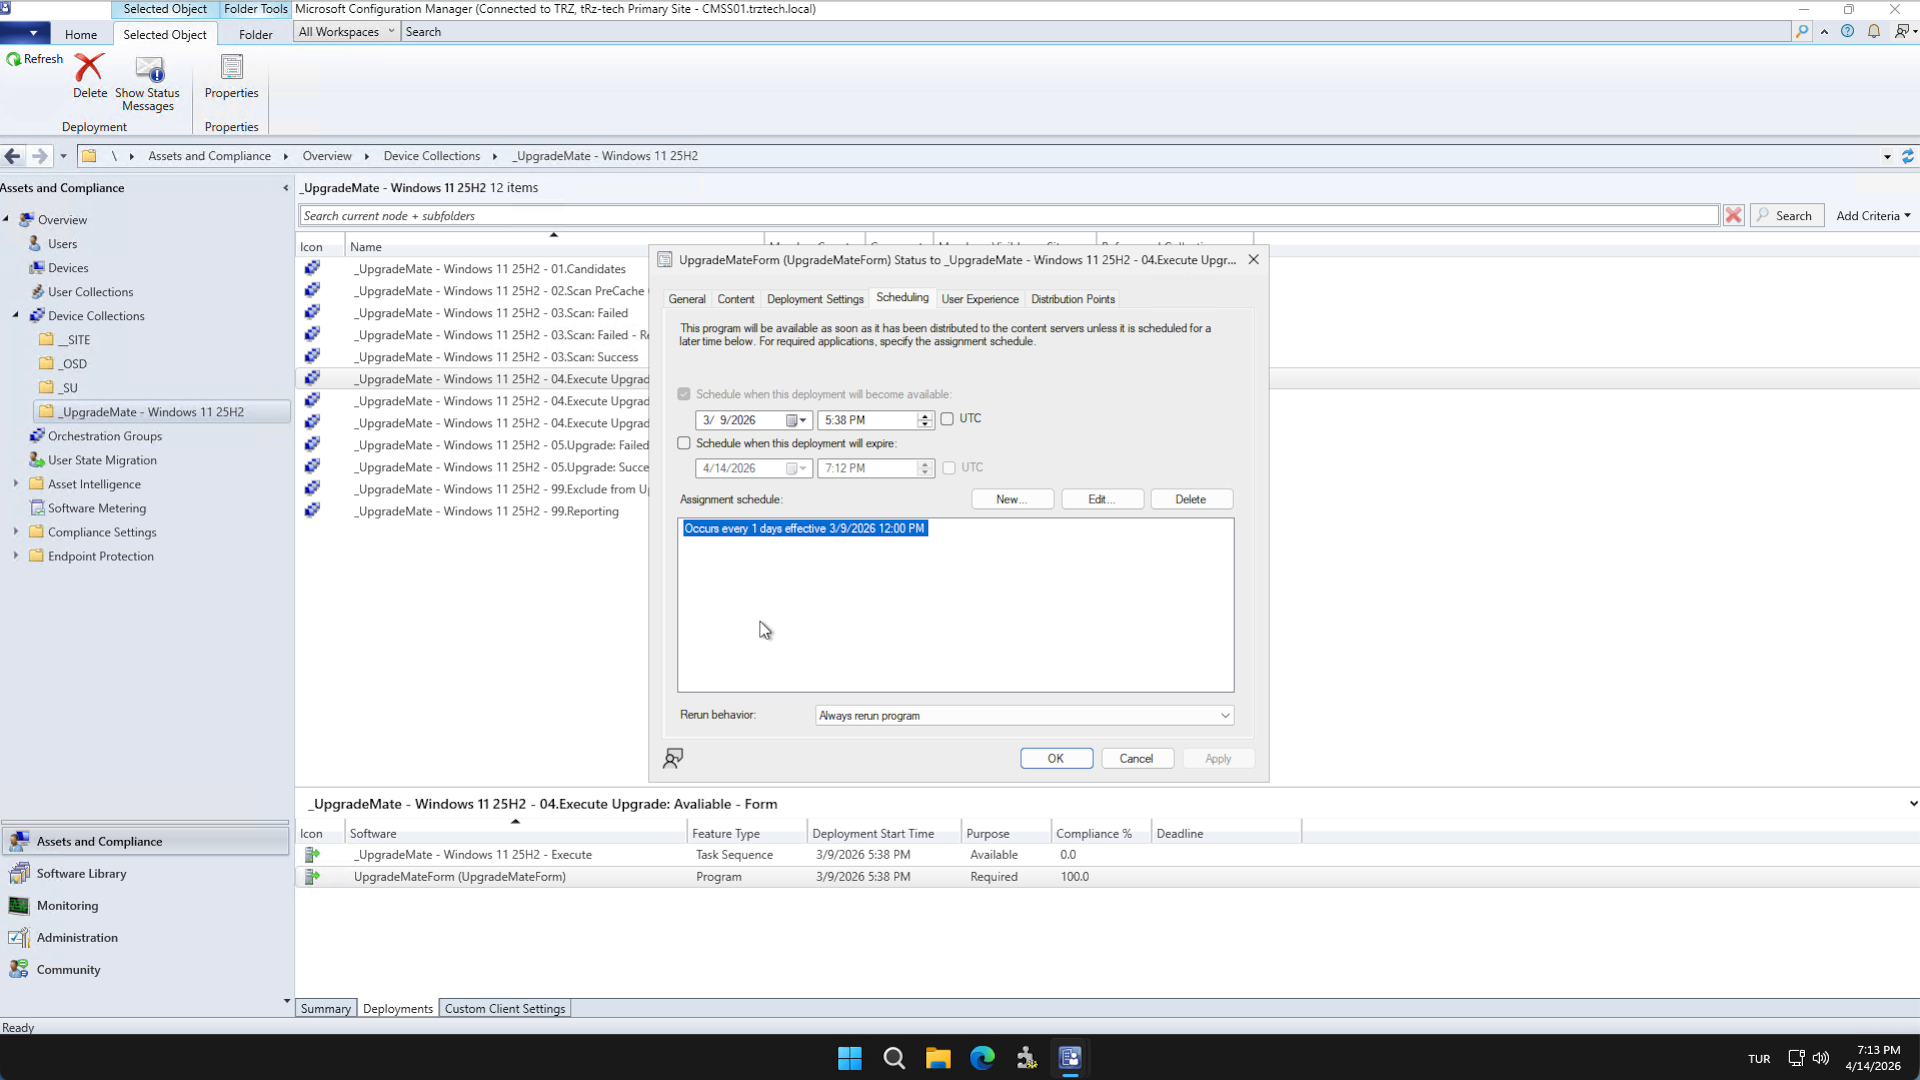
Tip: You can change this time or add additional schedules. Open the deployment and edit the schedule to match when you want the upgrade form to appear to your users.
Devices that fail the scan move to a separate collection. After 10 failed attempts the device stops retrying.
Devices whose scan succeeds are added automatically to the 04.Execute Upgrade: Available - Form collection, and the upgrade form starts appearing to the end-user.
After the upgrade runs, devices land in 05.Execute Upgrade: Success or 05.Execute Upgrade: Failed.
Note: Reporting is not done from these collections. Use the UpgradeMate Power BI dashboard for outcomes — it shows the failure reason, the failed step, and hardware/software details for each device.
Optional — Expired path: If a device is not upgraded within the Days to Force Upgrade period set in the wizard, it moves from 04.Execute Upgrade: Available to 04.Execute Upgrade: Expired. From this point the user only sees the Install Now option in the form — the Schedule and Postpone options are hidden.
Optional — Forced install: The 04.Execute Upgrade: Required collection lets you force the upgrade without user interaction. Create a new Required deployment of the Execute Upgrade task sequence and target it at this collection. The deployment then runs on the schedule you define.
Pilot Deployment Best Practices
Always run a pilot before letting UpgradeMate upgrade your full candidate list. The pilot lets you validate scan and install behaviour against the variety of devices in your environment.
For the pilot, add devices that represent different models, operating system versions, and installed software to 02.Scan PreCache Content. This pre-caches the upgrade content and triggers the scan workflow on a representative sample.
Once the pilot meets your target success rate, add the remaining candidates to 02.Scan PreCache Content in bulk. The deployment continues automatically based on the existing schedules.
Remember: the only collection you need to populate to start and trigger an upgrade is 02.Scan PreCache Content. Everything else happens through the existing collection memberships and deployments.
Distribute the UpgradeMate content to the right Distribution Points. If you imported a new ISO during setup, the new OS Upgrade Package(s) and the UpgradeMateForm package must be distributed to every DP that your candidate devices will reach for content download.
Reminder: Devices cannot scan or upgrade until the required content is available on a DP they can reach. Verify the content state on each DP before adding devices to
02.Scan PreCache Content.
You are ready to run the pilot. Add a small set of representative devices to 02.Scan PreCache Content and follow the workflow on the Power BI dashboard.