Initial Configuration
After successfully installing the setup file, the next step is to complete the UpgradeMate configuration through Configuration Manager. This guide walks you through the wizard from the welcome screen to the final completion screen, including environment detection, form design, OS package selection, distribution points, and the pilot deployment.
Video Tutorial
Requirements
- The computer where the UpgradeMate wizard is run must be able to reach the SMS Provider and the source share directory.
- The user account running the wizard must be a member of the Administrator role on the SCCM site.
- The wizard must be launched with Run as Administrator.
Step-by-Step Guide
Configure Your Environment
The wizard collects the information required for the installation and checks the prerequisites for setting up UpgradeMate.
Launch UpgradeMate. The welcome screen displays a short summary of the steps that follow. Click Next to continue.
The Configure Your Environment screen opens.
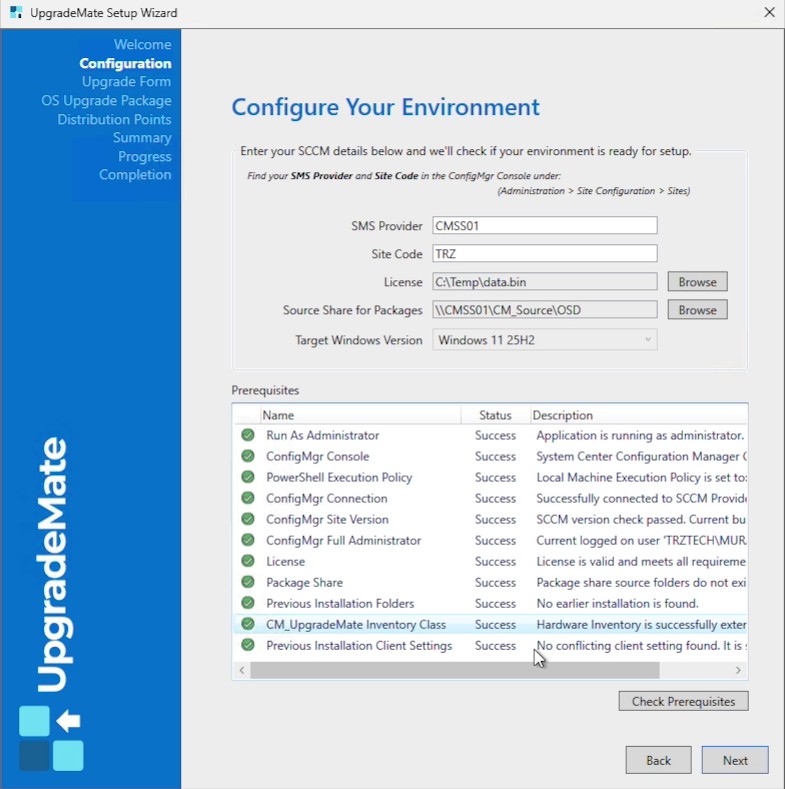
Provide the information required for installation and run the prerequisite checks. Any missing item is shown with a red X — use the details in the Description column to correct it.
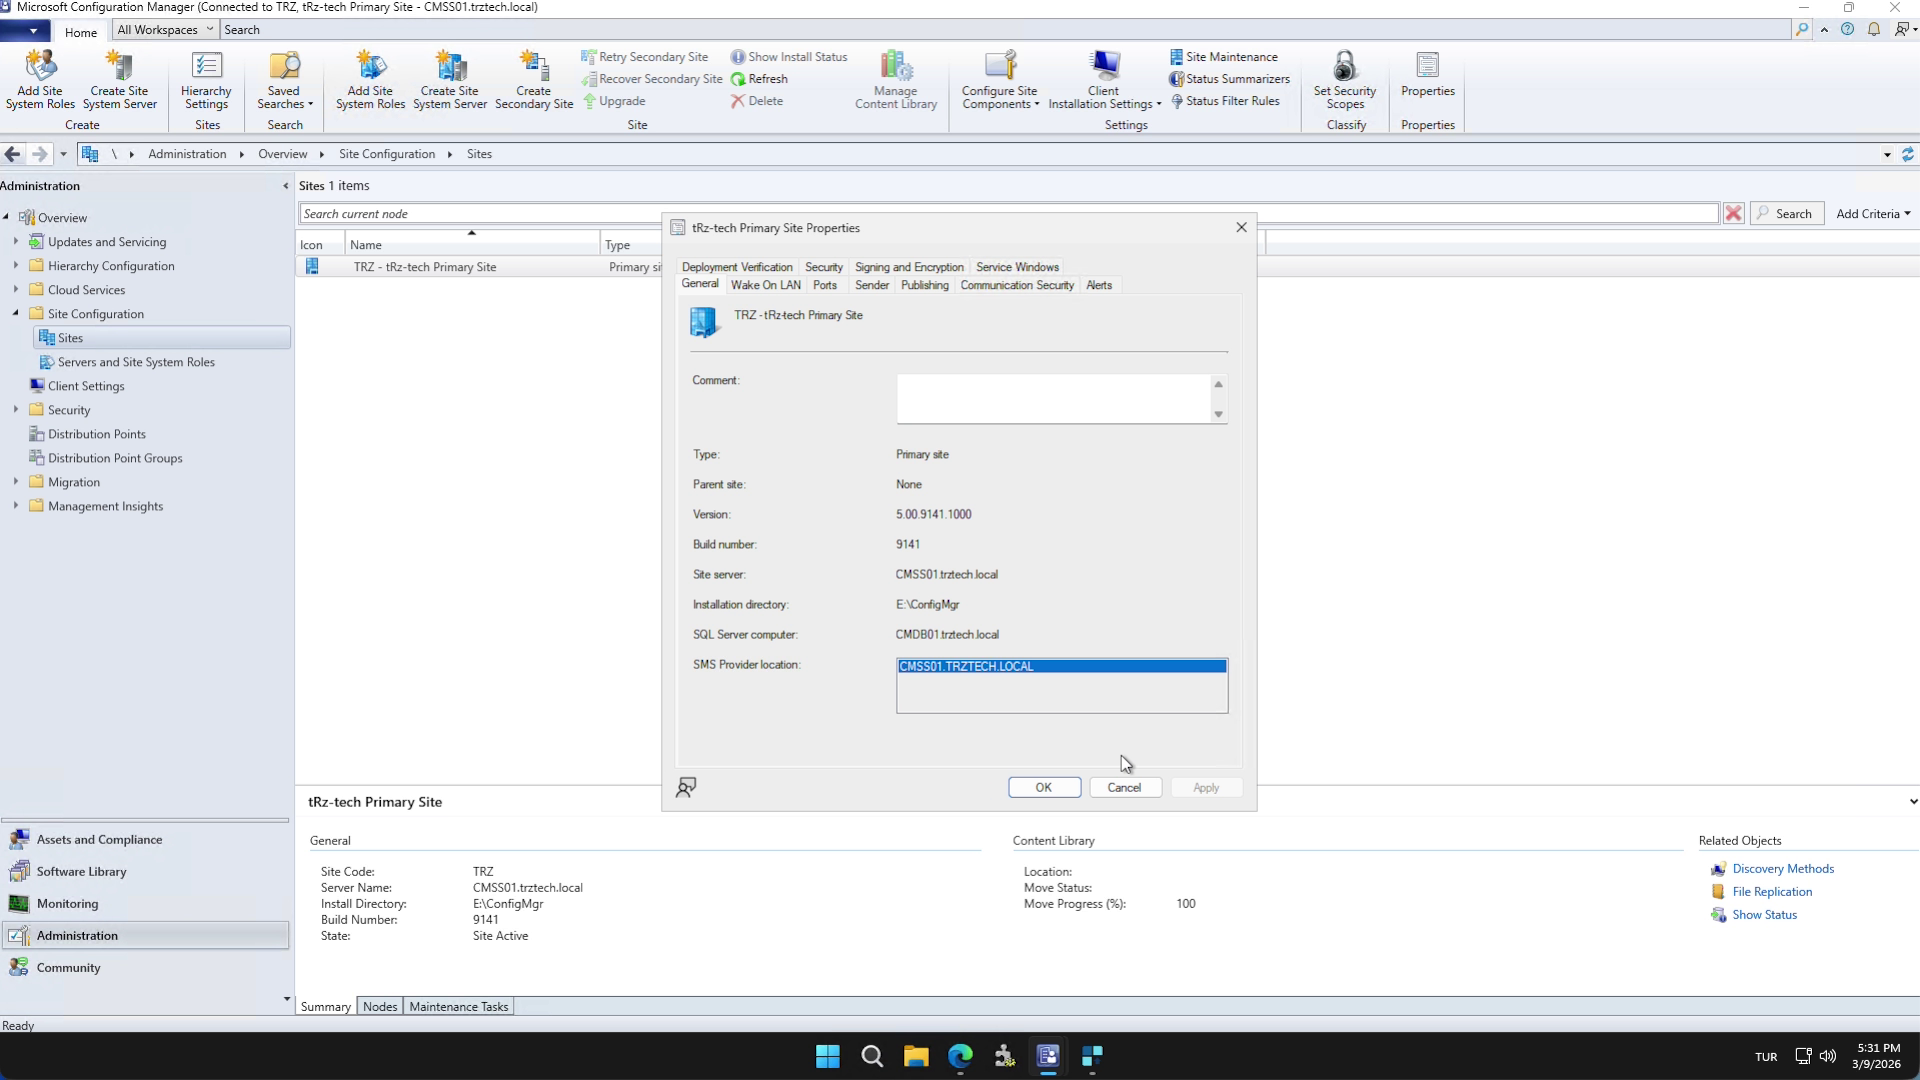
You can find the SMS Provider and Site Code values in the Configuration Manager console.
Select the License file to continue. The license also covers the operating system versions you can upgrade.
Specify the folder where the source files will be stored. The wizard automatically creates the directory structure it needs and will not interfere with your existing folders.
Click Check Prerequisites to validate the values you entered. If any check fails, the details appear in the Description column for that item so you can correct it.
Note: On a first install, the CM_UpgradeMate Inventory Class check may be reported as missing. See the Inventory Class Setup guide for the steps to import this class into Configuration Manager.
Design the Upgrade Form
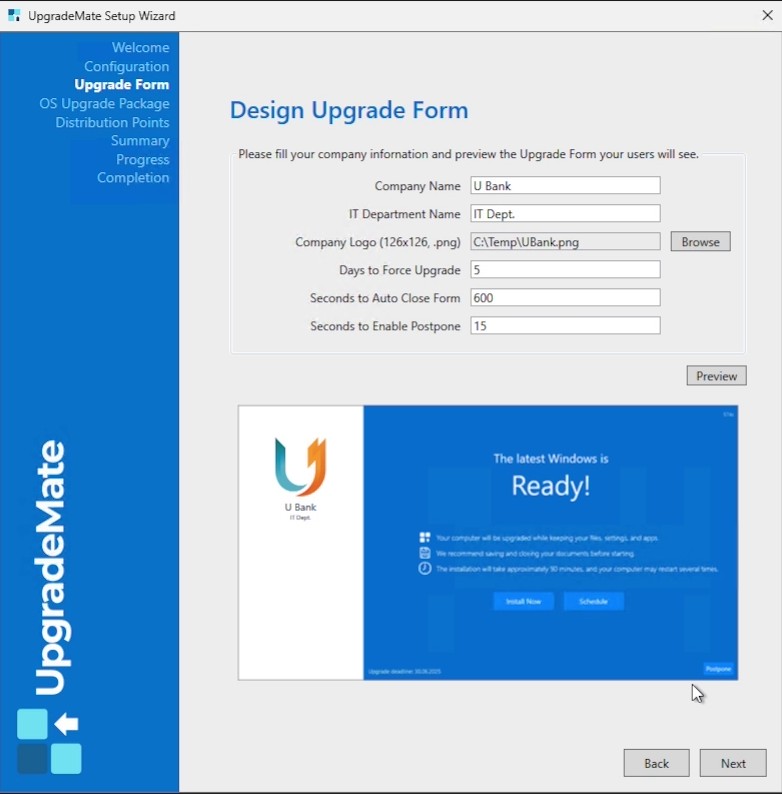
The Upgrade Form is what end-users see on their workstation when an upgrade is offered. The form is automatically displayed in each user’s operating system language.
Fill in your Company Name, IT Department Name, and browse to a Company Logo. The logo must be 126 x 126 pixels (.png).
Configure the timing options:
- Days to Force Upgrade — the number of days users see the form with all three options (Install Now, Schedule, Postpone). After this period, only Install Now remains and the Schedule and Postpone buttons are removed. Default:
5. - Seconds to Auto Close Form — how long the form stays open before it closes automatically. Default:
600(10 minutes). - Seconds to Enable Postpone — the Postpone button is the most-clicked button, so it is disabled for the first few seconds to make sure users see the message. Default:
15.
- Days to Force Upgrade — the number of days users see the form with all three options (Install Now, Schedule, Postpone). After this period, only Install Now remains and the Schedule and Postpone buttons are removed. Default:
Click Preview to see how the form will look to your users. The defaults are the most commonly used values, but you can change any of them. Click Next to continue.
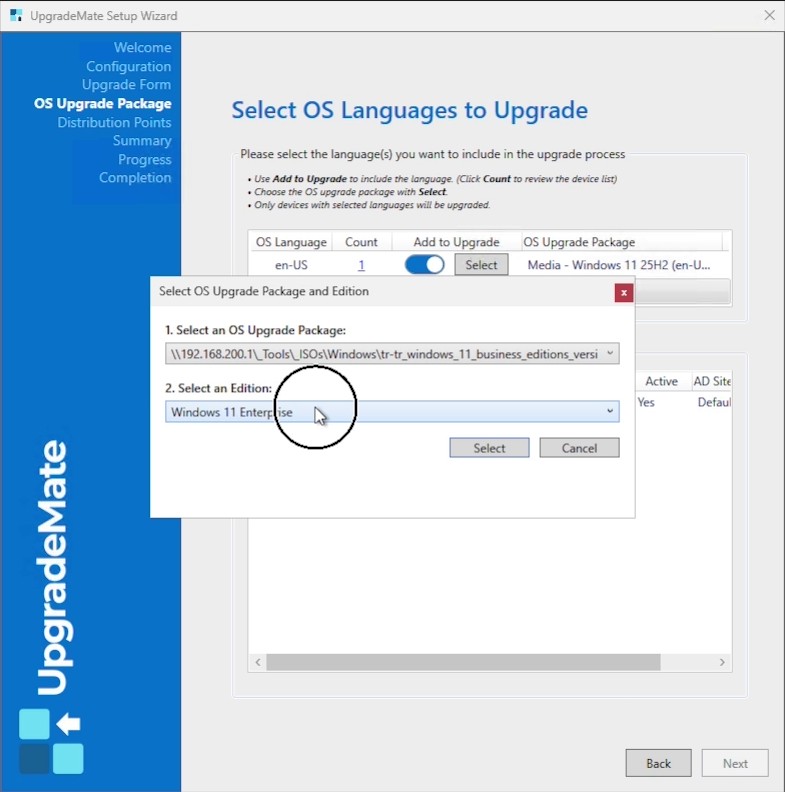
Select OS Languages and Packages
UpgradeMate scans your environment and lists every OS language in use. A separate upgrade package is required for each language you decide to upgrade.
For each language, decide whether to include it in the upgrade. Toggle Add to Upgrade on for languages you want to upgrade; languages you leave off are excluded from deployment. Click the count value under the Count column to review the list of devices for that language.
For an included language, click Select. If a matching upgrade package (for example Windows 11 25H2 in en-US) already exists in your console, it appears in the dropdown and you can select it directly.
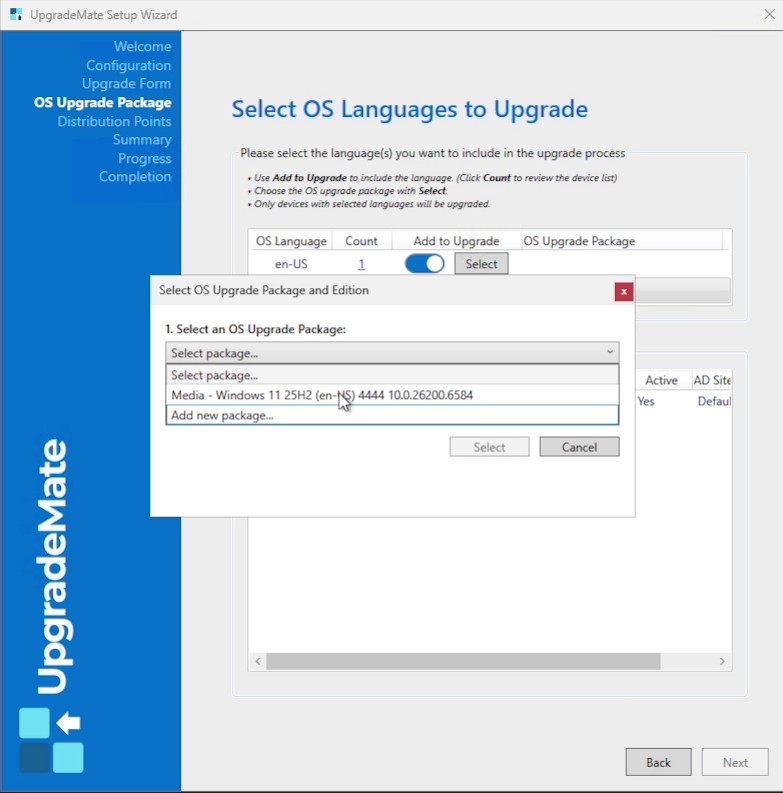
If no package exists yet for that language, choose Add new package… and point UpgradeMate at the Windows ISO file. UpgradeMate automatically locates the correct edition inside the ISO. Choose Windows 11 Enterprise (recommended) and click Select. Click Next to continue.
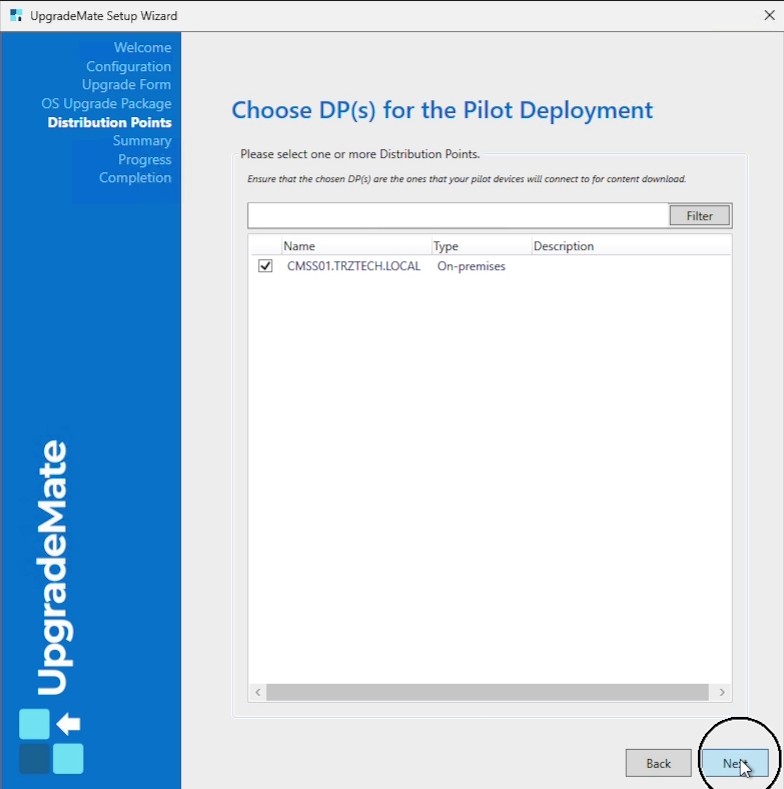
Choose Distribution Points for the Pilot
Always run a pilot before deploying to production. Select only the Distribution Points that your pilot devices will connect to for content download — not your whole production infrastructure.
Select one or more Distribution Points to host the upgrade content for the pilot. You can use the Filter box to narrow the list. Click Next to continue.
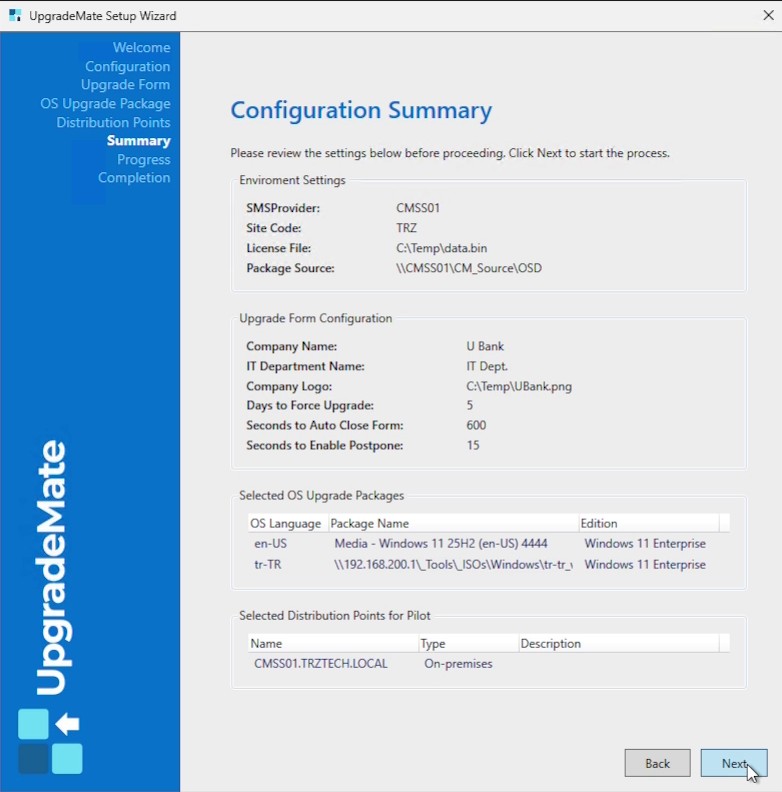
Review the Configuration Summary
The Configuration Summary screen lists everything you configured: environment settings, upgrade form details, selected OS upgrade packages, and pilot distribution points.
Review every section carefully. If anything is wrong, click Back to go back and correct it. When everything is correct, click Next.
Run Setup
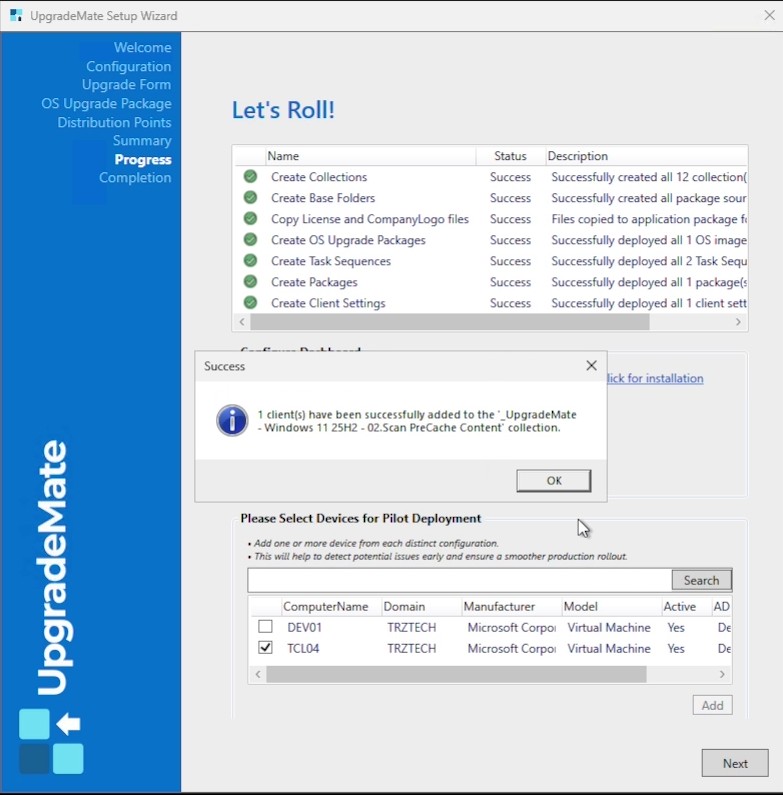
UpgradeMate now creates everything it needs in Configuration Manager: Collections, Package source folders, OS upgrade packages, Task Sequences, Packages and Client Settings.
Each task is shown with its status and a description of what was created. Depending on the number of selected packages, this typically takes 3 to 5 minutes.
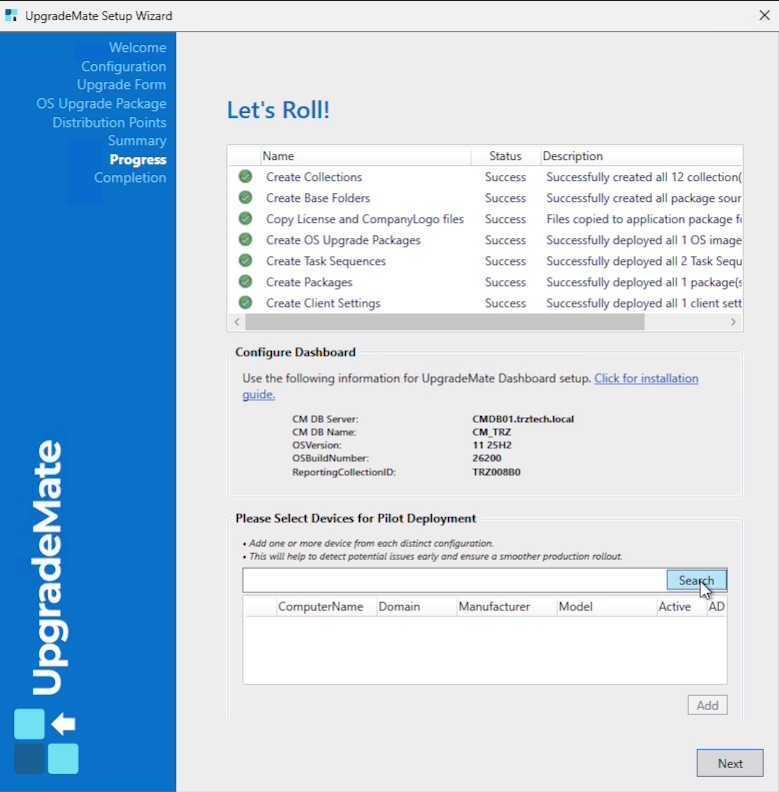
When setup finishes, the Configure Dashboard section shows the values you will need for the Power BI dashboard setup (CM DB Server, CM DB Name, OS Version, OS Build Number, ReportingCollectionID). Use these values when following the Power BI Dashboard Setup guide.
Under Please Select Devices for Pilot Deployment, search for one or more devices that represent each distinct configuration in your environment, then click Add. A confirmation message appears for each device added to the pilot collection. Adding pilot devices here helps surface issues early before the production rollout.
Completion
The final screen summarises the items UpgradeMate created in your environment (collections, base folders, OS upgrade packages, task sequences, packages, and client settings). Expand any section to see the items it contains.
Before you start a production rollout, click Click here to open the step-by-step deployment guide and follow the recommended actions. When you are done, click Close.
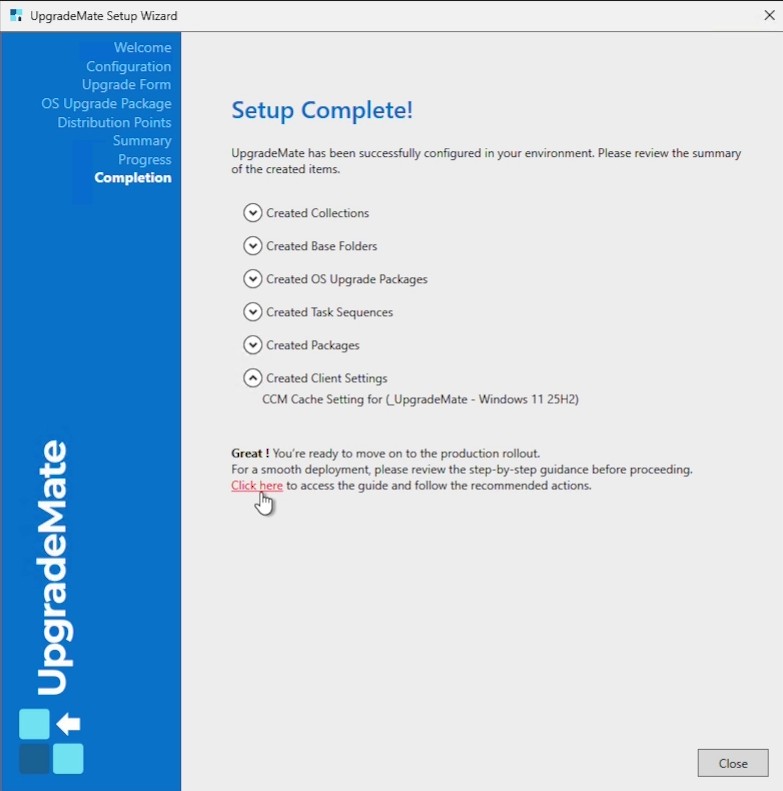
Initial Configuration complete. UpgradeMate is configured in your Configuration Manager environment and ready for the pilot deployment.