Inventory Class Setup
This guide explains how to integrate the CM_UpgradeMate hardware inventory class into your Microsoft Endpoint Configuration Manager (MECM/SCCM) environment. The process has two parts: extending the client hardware inventory schema, and importing the class into Client Settings so the data becomes available for reporting and queries.
Video Tutorial
Requirements
- The Configuration Manager console installed on the machine where you perform these steps.
- Write access to the SCCM site server’s installation directory (specifically the
inboxes\clifiles.src\hinvfolder). - Membership in a role that allows modification of Default Client Settings — typically the Full Administrator role.
- The UpgradeMate MOF files (
Configuration.mofandSMS_DEF.mof) — by default located atC:\Program Files\UpgradeMate\MOF\.
Step-by-Step Guide
Extend Hardware Inventory
This part adds the CM_UpgradeMate class definition to your site’s configuration.mof file so that clients begin reporting UpgradeMate data.
Locate the source
Configuration.moffile provided by UpgradeMate. By default it is found inC:\Program Files\UpgradeMate\MOF\.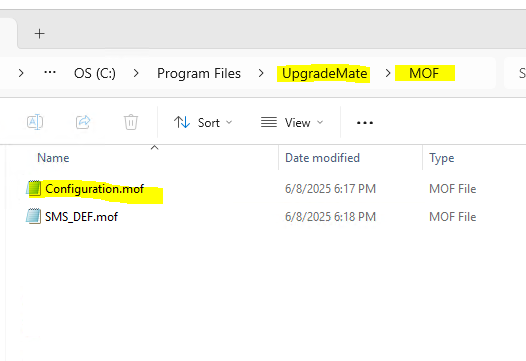
Open this
Configuration.moffile with a text editor like Notepad and copy its entire content to your clipboard.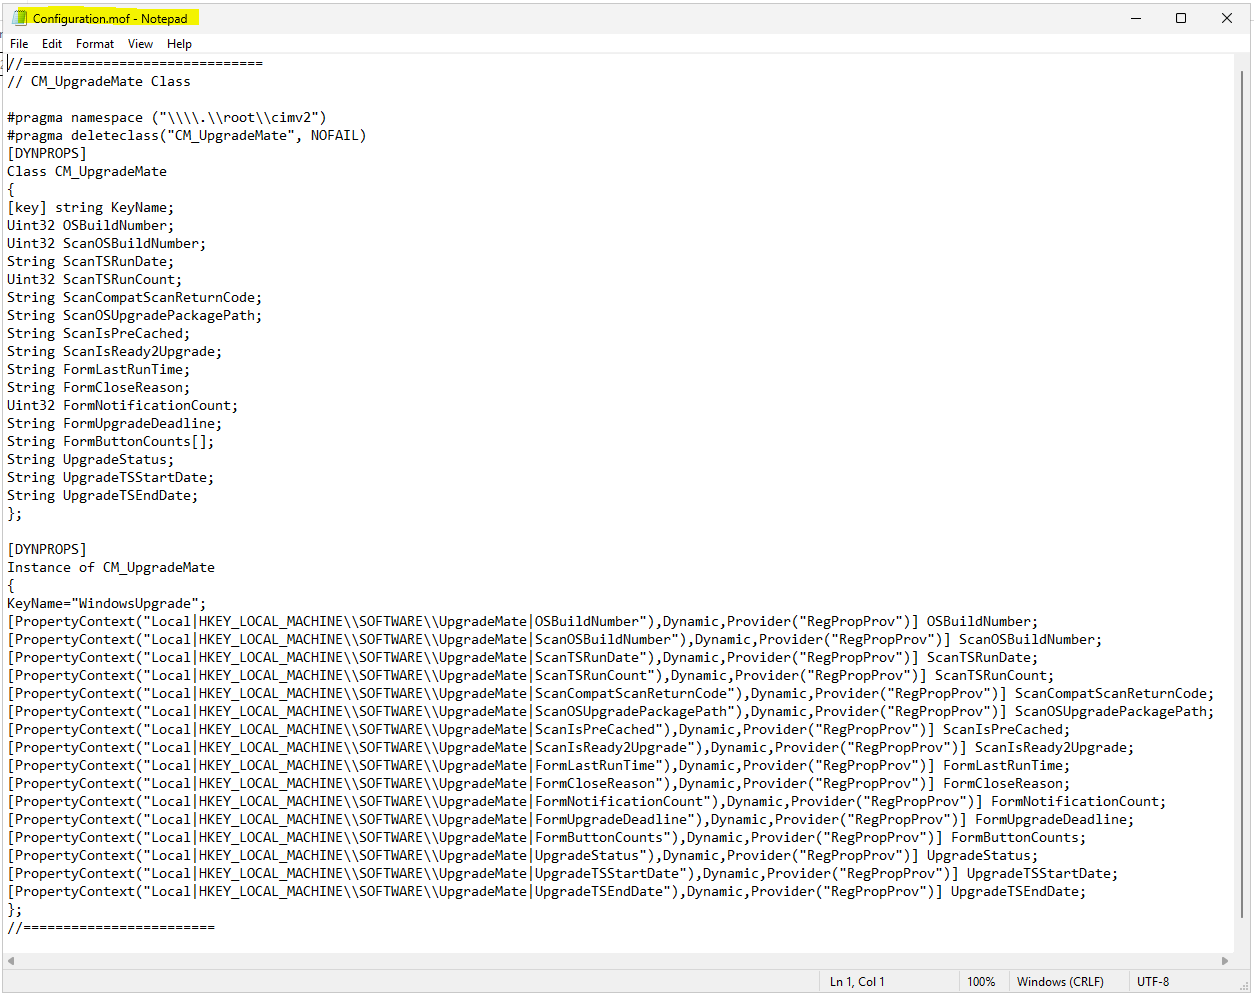
To find the destination
configuration.moffile, you first need to identify your Configuration Manager installation directory. In the console, navigate to Administration → Site Configuration → Sites. Select your site, and the Install Directory is listed in the details pane.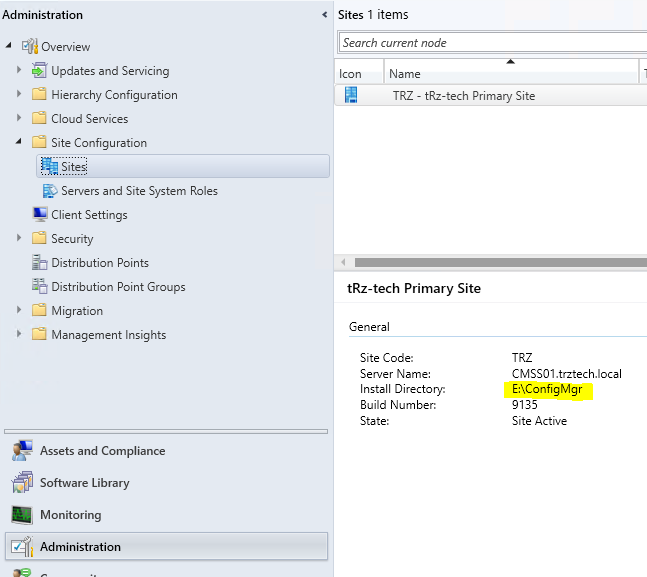
Navigate to the following path within your ConfigMgr installation directory:
[Install Directory]\inboxes\clifiles.src\hinv. Open theconfiguration.moffile in this location with a text editor.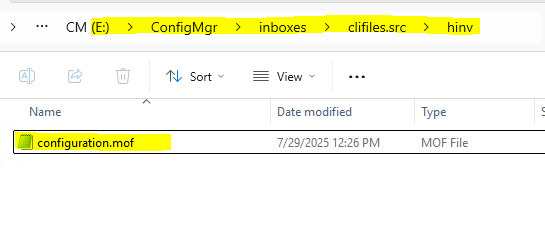
Warning: Back up your
configuration.moffile before making any modifications.Scroll to the bottom of the file. Add the content you copied from the UpgradeMate MOF file between the
// Added extensions startand// Added extensions endcomments. If these comments do not exist, add the content at the bottom of the file. Save and close the file.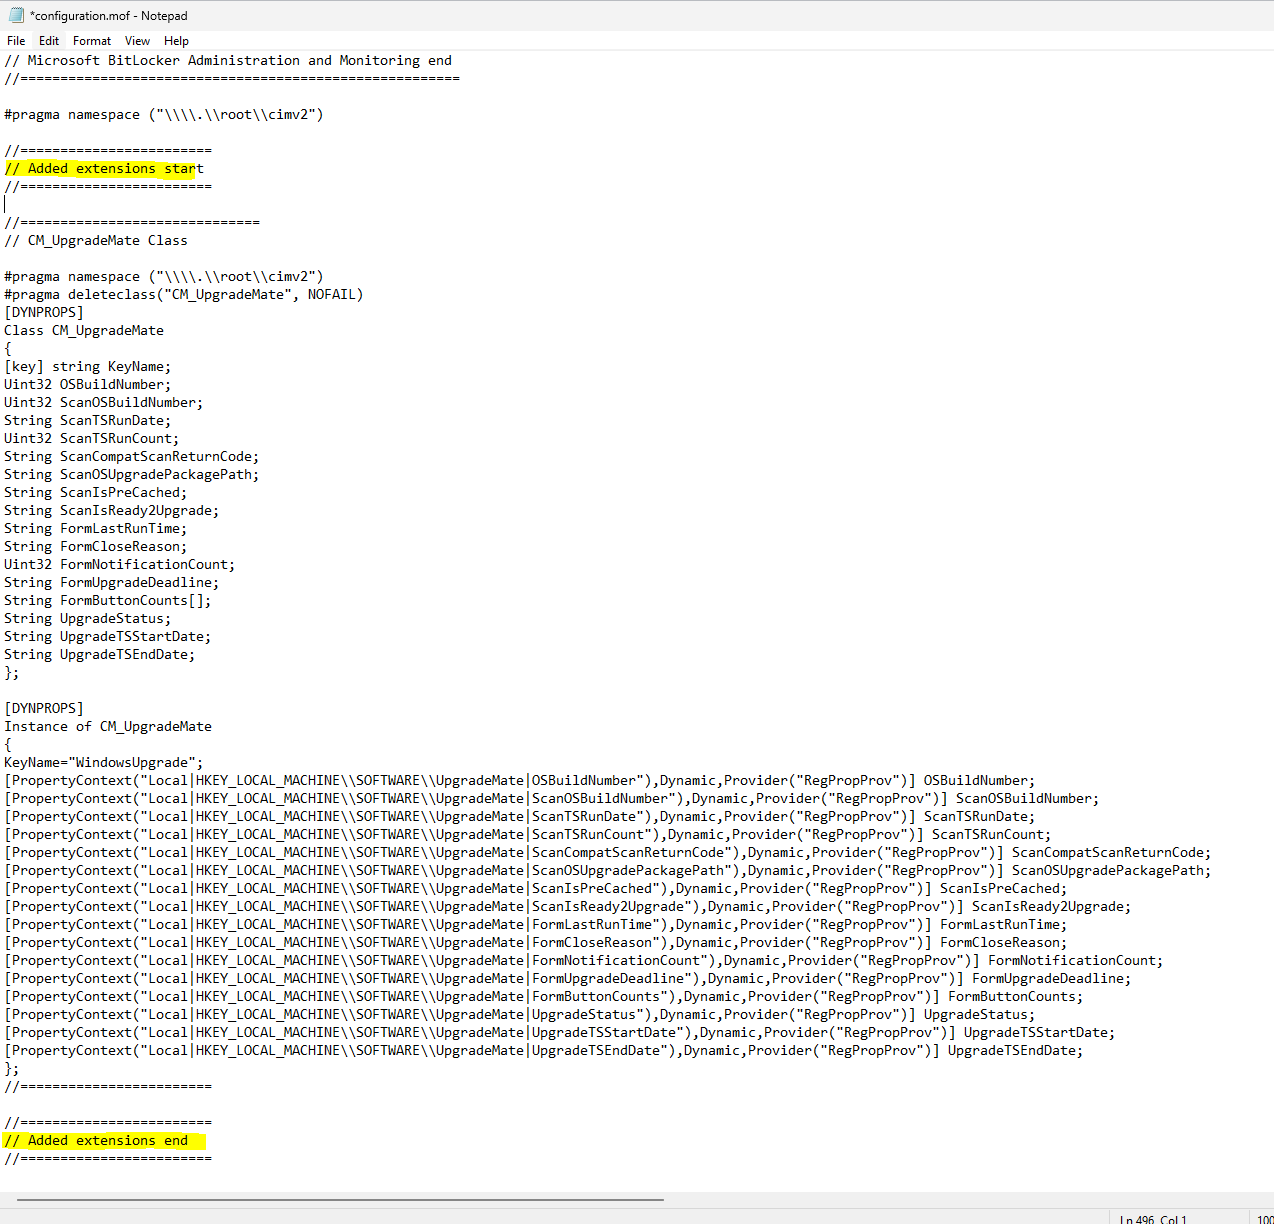
Import Reporting Class
Now that the hardware inventory schema is extended, this part imports the CM_UpgradeMate class into Client Settings so the collected data is visible in the ConfigMgr database for reporting and queries. You will need the SMS_DEF.mof file, by default located at C:\Program Files\UpgradeMate\MOF\SMS_DEF.mof.
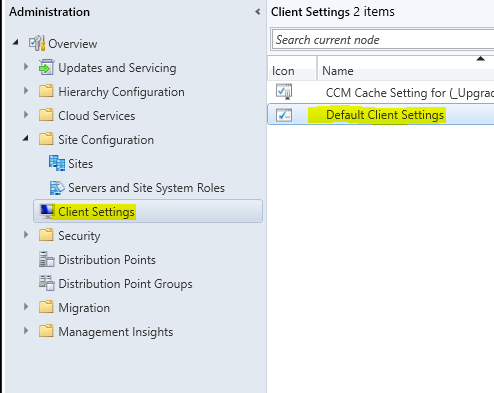
In the Configuration Manager console, go to the Administration workspace, then navigate to Site Configuration → Client Settings. Select Default Client Settings in the list and click Properties from the ribbon on the Home tab.
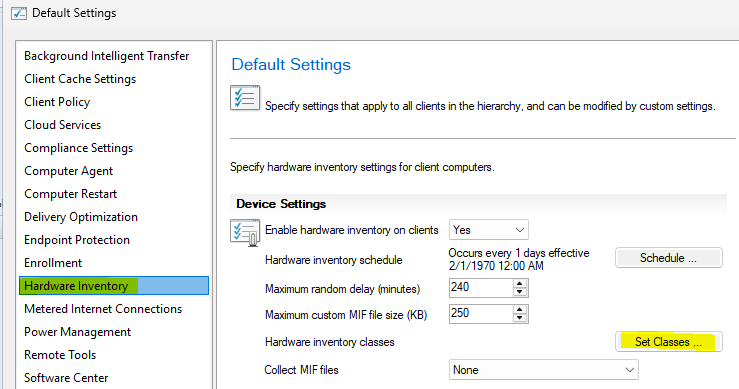
In the Default Settings dialog, choose Hardware Inventory from the left-hand menu. Then, in the Device Settings list, click the Set Classes… button.
The Hardware Inventory Classes dialog opens. Click the Import… button to add a new class.
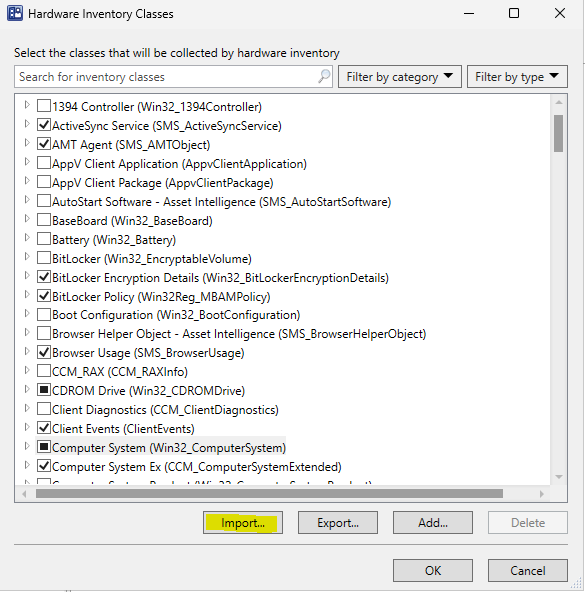
In the file selection dialog, browse to and select the
SMS_DEF.moffile provided by UpgradeMate, then click Open.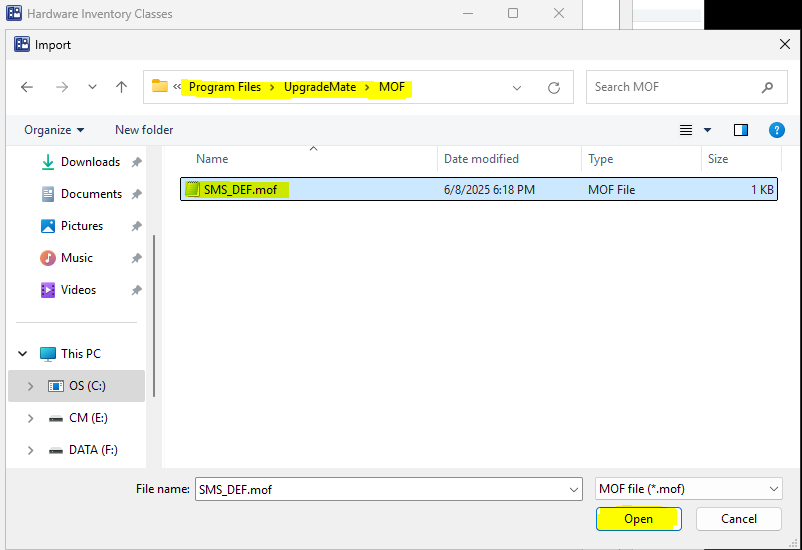
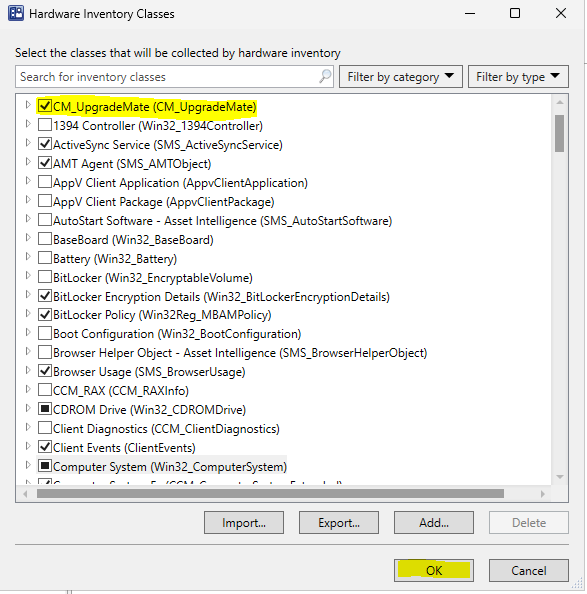
On the Import Summary screen, you will see the CM_UpgradeMate class that will be added. Review the items, then click Import.

Once the import completes, you are returned to the Hardware Inventory Classes dialog. Verify that the newly added CM_UpgradeMate (CM_UpgradeMate) class is present and checked (enabled). Click OK to save the changes.
Finally, click OK in the main Default Settings window to finalize the process and apply the new settings to your clients.
Configuration Manager will now begin collecting UpgradeMate data from clients, making it available for reporting.